Owen's Notes: Difference between revisions
No edit summary |
|||
| Line 55: | Line 55: | ||
[[File:calwidget_windscram.png|none|The calwidget window with windscram shown at 22:14:05 highlighted in red.]] | [[File:calwidget_windscram.png|none|The calwidget window with windscram shown at 22:14:05 highlighted in red.]] | ||
Select the earliest calibration that does not have a windscram, and then click on 'Analyze as Refcal'. The Sigma map should | Select the earliest calibration that does not have a windscram, and then click on 'Analyze as Refcal'. The Sigma map should now be populated as shown below: | ||
[[File:calwidget_lowband_good.png|none|The calwidget window with sigma map. It also shows power and phases for Antenna 1 and Frequency Band 12.]] | [[File:calwidget_lowband_good.png|none|The calwidget window with sigma map. It also shows power and phases for Antenna 1 and Frequency Band 12.]] | ||
The above chart is for the low-band (channels 1 to 12). Yellow blocks indicate bad or unavailable data. Bands 3 and 4 are excluded due to intense RFI at these frequencies. Antenna 5 currently is not operating well, and will be excluded from any analysis. The green blocks indicate that the data may be alright if some points are excluded. Purple blocks indicate the data is good. | |||
Also shown in the above plot is the power and phase for Antenna 1 and band 12. The blue points are the X-polarization and the orange points are the Y-polarization. These should be close to straight lines. | |||
In this case we need to exclude all of Antenna 5 from the calibration. First click on any block for antenna 5 in the range of band 1 to 12. Next check the box 'Apply to all bands'. Move the mouse over to either the Power or Phase plots (either works). We need to exclude all points. Move the mouse slightly before the first point in the chosen plot and press the 'A' key. A green line will appear. next move the mouse slightly past the last point and press the 'B' key. A red line will appear. The screen should look like the figure below. | |||
[[File:calwidget_lowband_timeflag_all_bands.png|none|The calwidget window with antenna 5 having all points flagged for all bands.]] | |||
== Update Antenna Pointing (17 March 2020) == | == Update Antenna Pointing (17 March 2020) == | ||
Revision as of 18:51, 23 March 2020
Remote Login (23 March 2020)
The computers can be accessed remotely using SSH and VNC. Since I use Linux (Ubuntu) these instruction are for that OS.
To VNC into Helios, open a terminal and type the following command:
ssh -L 5902:helios.solar.pvt:20000 oweng@ovsa.njit.edu
I then open Remmina Remote Desktop Client. Make sure VNC is selected at the top left. Type in:
localhost:2
and enter the password when prompted.
The Helios display should now be visible.
Occasionally, the VNC connection will be lost. If this occurs the following procedure need to be performed.
From a new terminal window type:
ssh -L 8887:helios.solar.pvt:22 oweng@ovsa.njit.edu
From another terminal issue the command:
ssh -p 8887 sched@localhost
Now type in:
x11go
Now restart the VNC client.
Phase Calibrations (23 March 2020)
Phase calibrations are to be performed every day when possible.
Access the Helios computer.
On the terminal window make sure that the ipython: /home/user tab is selected.
There should be a prompt as follows: pipeline:~>
At the prompt type the following command:
python /common/python/current/calwidget.py
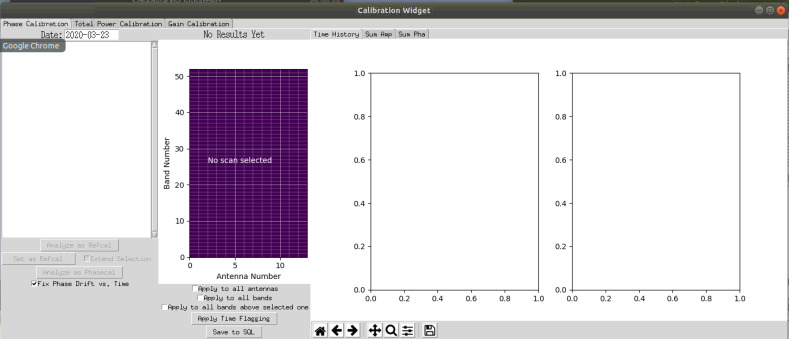
The following window will open up:
In the date box near top right of the window type in or use the up and down arrows to select the previous days date and hit enter.
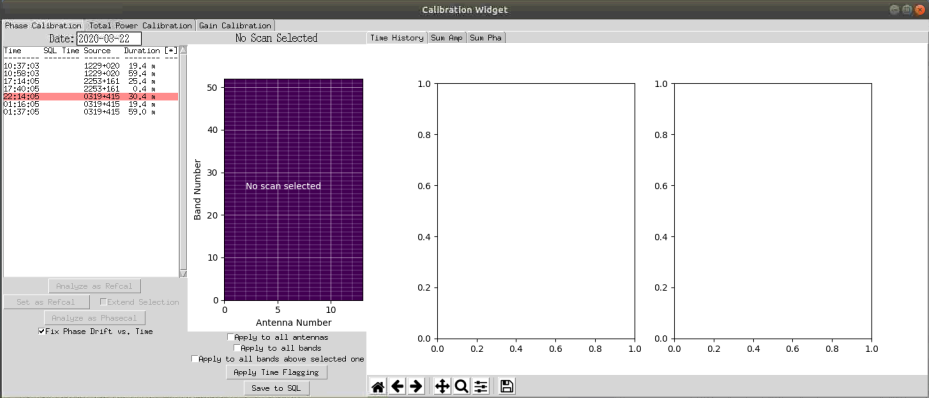
Click on the first available scan that does not suffer from a Windscram. Windscrams are marked in red. If a windscram occurred for less than 20% of the scan then it will be marked in yellow and may still be usable. The example below shows a windscram at 22:14:05.
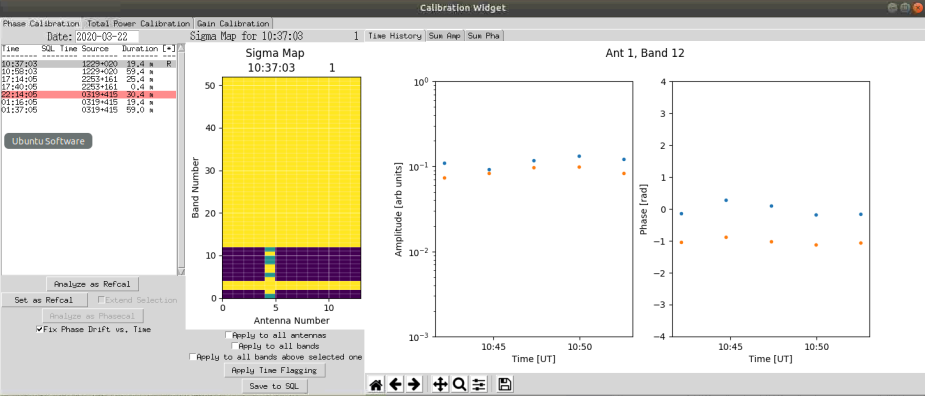
Select the earliest calibration that does not have a windscram, and then click on 'Analyze as Refcal'. The Sigma map should now be populated as shown below:
The above chart is for the low-band (channels 1 to 12). Yellow blocks indicate bad or unavailable data. Bands 3 and 4 are excluded due to intense RFI at these frequencies. Antenna 5 currently is not operating well, and will be excluded from any analysis. The green blocks indicate that the data may be alright if some points are excluded. Purple blocks indicate the data is good.
Also shown in the above plot is the power and phase for Antenna 1 and band 12. The blue points are the X-polarization and the orange points are the Y-polarization. These should be close to straight lines.
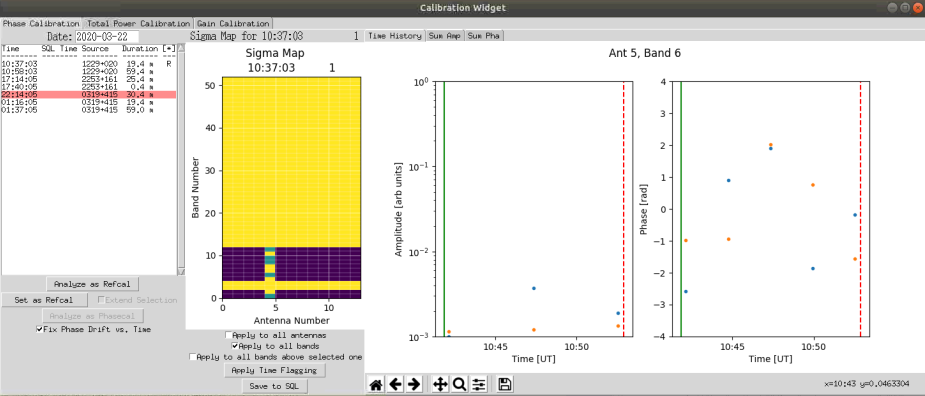
In this case we need to exclude all of Antenna 5 from the calibration. First click on any block for antenna 5 in the range of band 1 to 12. Next check the box 'Apply to all bands'. Move the mouse over to either the Power or Phase plots (either works). We need to exclude all points. Move the mouse slightly before the first point in the chosen plot and press the 'A' key. A green line will appear. next move the mouse slightly past the last point and press the 'B' key. A red line will appear. The screen should look like the figure below.
Update Antenna Pointing (17 March 2020)
Access the Pipeline Computer.
From the terminal, start ipython:
ipython --pylab
Import the calibration and Time libraries:
import calibration as cal
from util import Time
Load up the solar pointing scans for a given date and time.
x,y,qual=cal.solpntanal(Time('2020-03-17 18:30'))
The above command will load the scans from the 17 March 2020 18:30 UT.
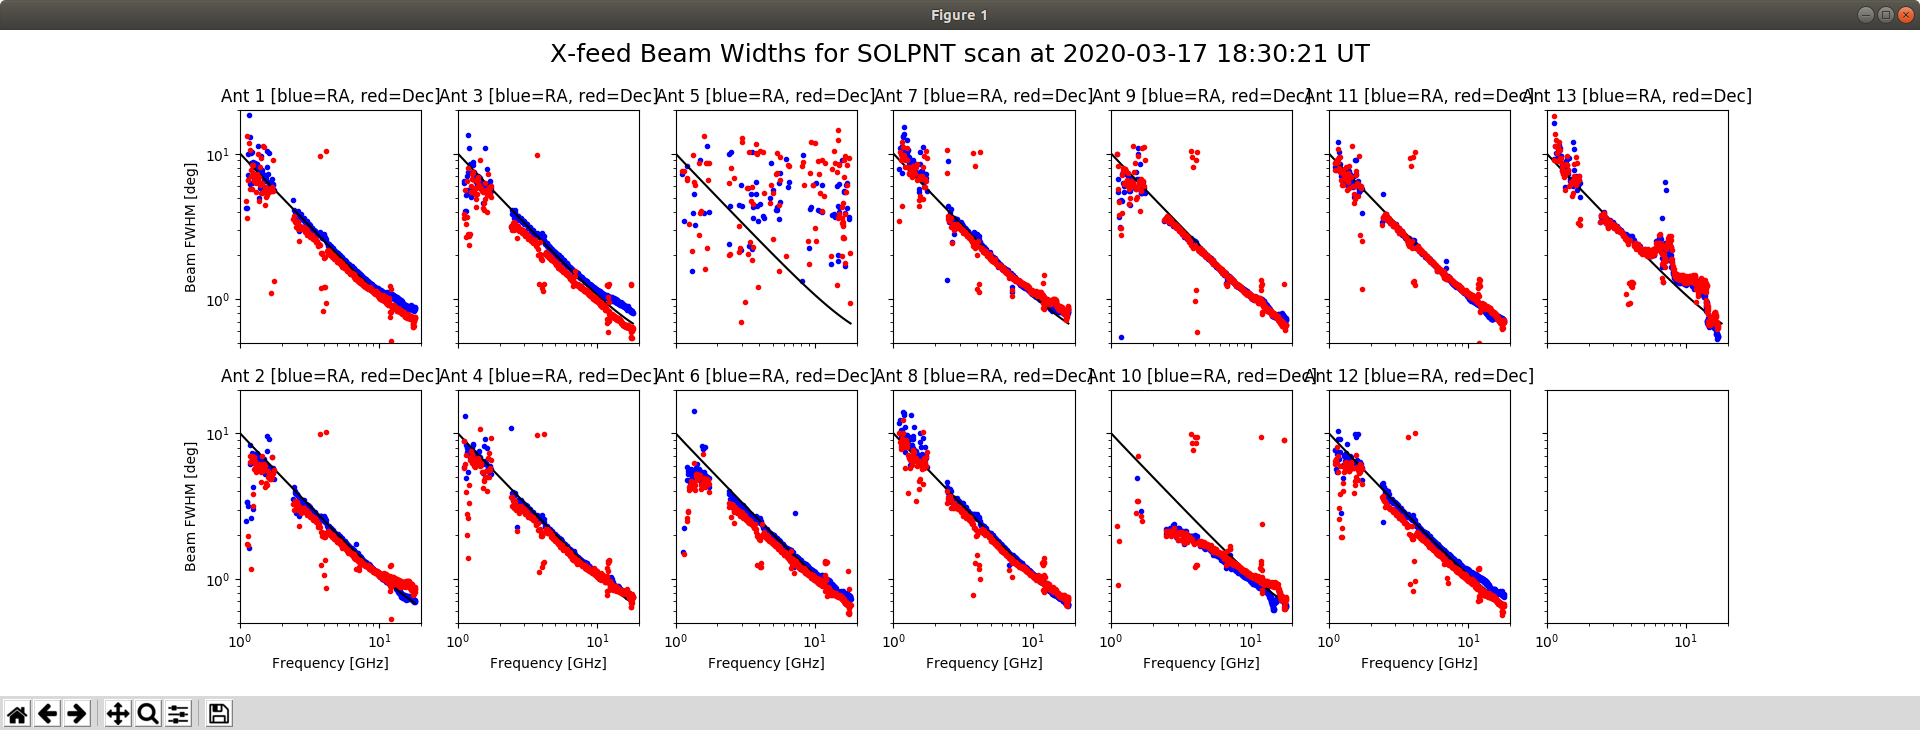
To view the beam widths as a function of frequency for each antenna and polarisation:
cal.sp_bsize(x,y)
To obtain the pointing offsets:
xoff,yoff,dx,dy=cal.sp_offsets(x,y)
This will display the offsets for each antenna and feed. Ideally the offsets should be at zero. If particular antennas significantly deviate from zero then a correction can be made.
For example, the following command will adjust the pointing offsets for antennas 6 to 8, 10 and 13:
cal.offsets2ants(Time('2020-03-17 18:30'),xoff,yoff,antst='ant6 ant7 ant8 ant10 ant13')
The newer antennas with the alt-az drives that have had tracking updated will need to be rebooted. From the Schedule Window issue the commands:
reboot 1 ant6-8
tracktable sun_tab.radec 1 ant6-8
track ant6-8
The antenna pointing adjustment is typically performed once per month.
Helios Displays
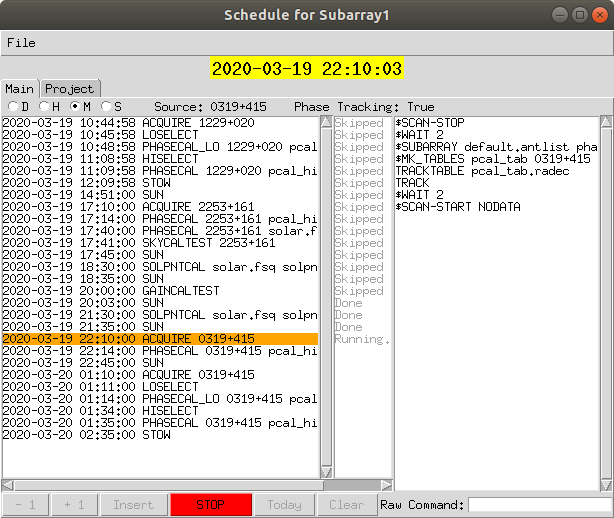
The Schedule window show the currently running schedule as shown below.
The left side of the window shows each of the scripts that is to be run. The orange bar shows the task that is currently being run.
The right side of the window shows each command that is to be run in the current script.
At the bottom of the window are a series of buttons. The STOP button will stop at the current script. Once stopped, the remaining buttons will become active.
